Welder Spool Gun Upgrade
|
|
|
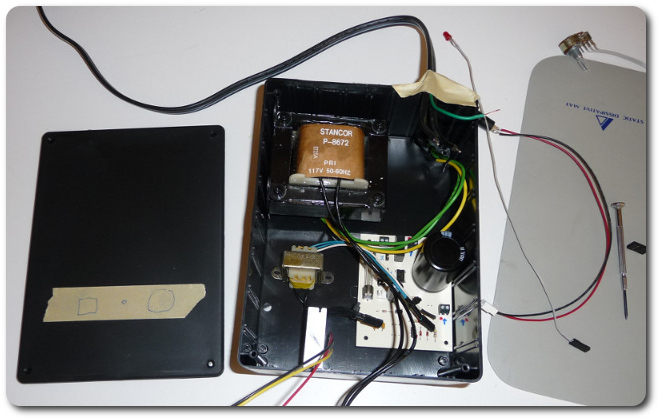
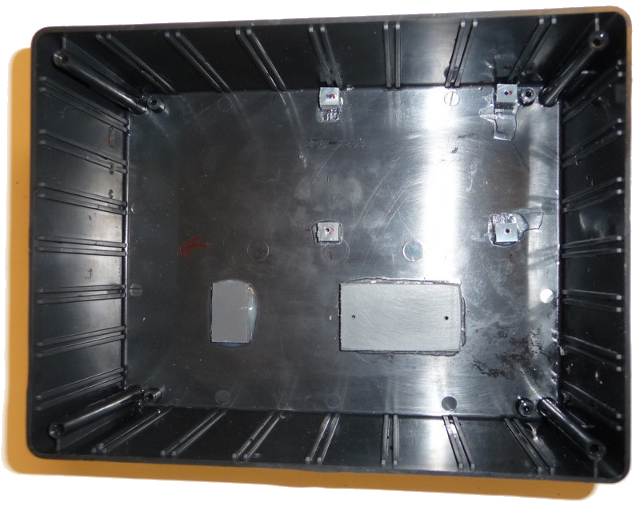
I picked up a big project box from Radio Shack and played with where I wanted everything to go.
|
|
|
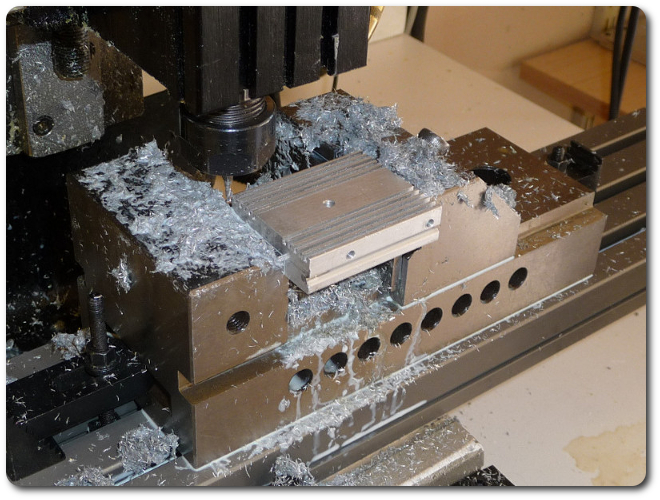
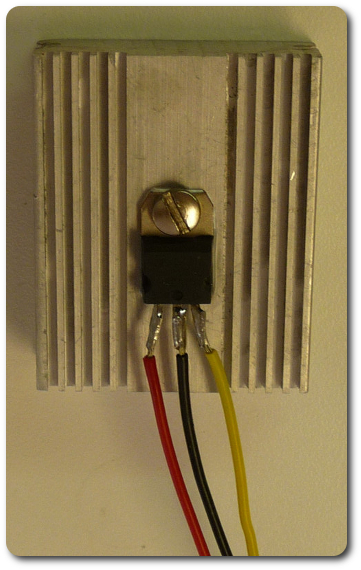
The pulse-width modulator cycles a MOSFET (transistor) to vary the apparent voltage to the drive motor. At the predicted high end (36 volts and 2 amps), this is a lot of power, which equates to a lot of heat. I toyed with a number of heat sinks, but I decided on a passive hunk of aluminum. It's not the best, but the duty cycle on the welder itself is only 30%, so this will have time to cool. Mainly for fun, because I love my mill so much, I decided to add a few fins.
|
|
|
I can't say the fins do a lot (because I didn't do any calculations or measurements), but they sure do look cool.
|
|
|
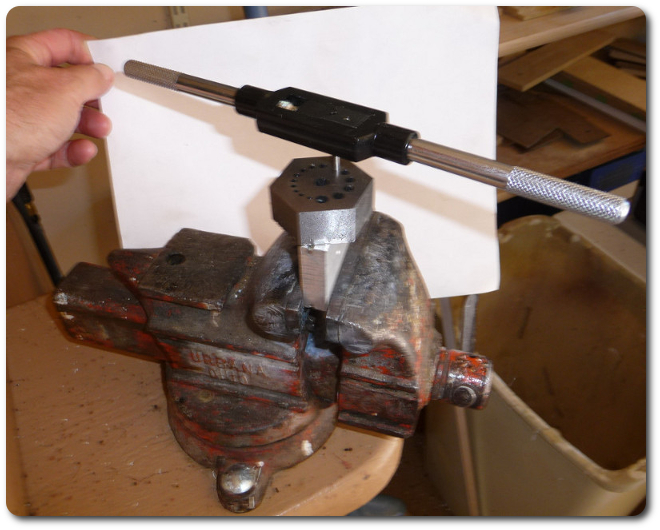
Tapping the mount holes. This is my dad's old vise from who knows when, maybe 50 years ago. I have a nice big, new one for the bench project, but this one sees its share of use.
|
|
|
Laying out the mount pads. The project box is too thin to screw into, so I cut these little PVC sections. The nice thing about PVC and ABS plastic is that standard plumbing cement (or model cement or super glue) bond them well.
|
|
|
In fact, I use PVC so often that I have a bunch of different sizes on my stock shelf.
|

|
|
Everything is mounted. It's a tradition to date all my projects.
|

|
|
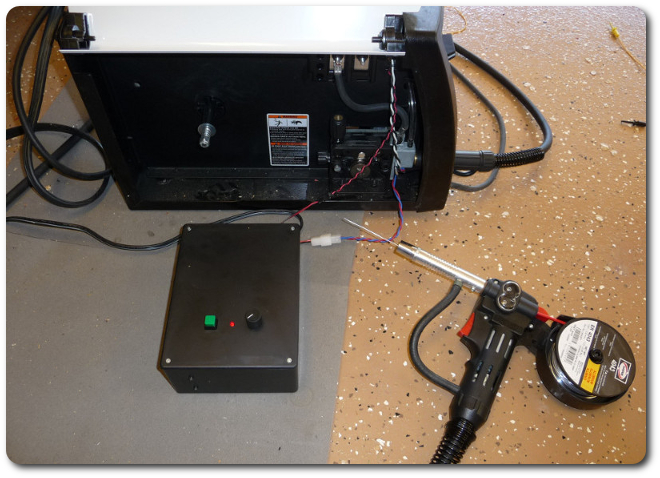
Making sure it still works. Even at this late stage, my controller has never actually contributed to a real weld. All it's done is activate the various welding components without striking an arc. The reason is that I couldn't get the whole contraption to a safe place because it was always tethered to something that couldn't move during development.
|

|
|
All closed up and ready for a real test.
|
|
|
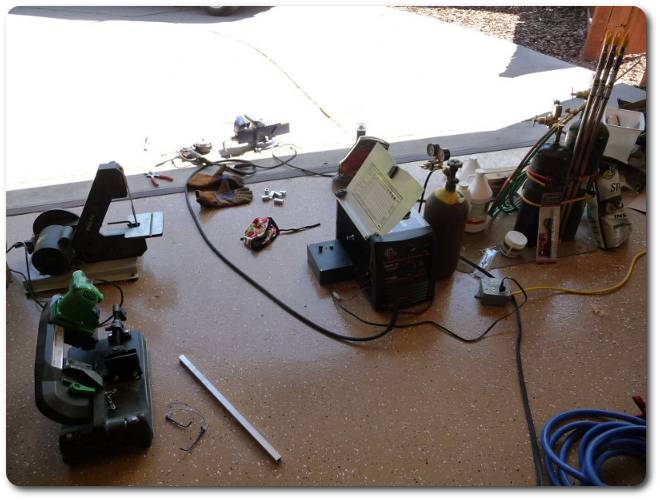
Working on the floor is a nuisance, but I don't have a lot of options. I had moved my other bench the previous summer, and it was serving as my kitchen table (!) at the new place until I could get things straightened out with this move. (The big vise is outside.).
|
|
|
Calibrating my controller took a while. (By the time I was done, it looked like I was building a Transformer — or taking one apart.) I have very few performance specifications on the Hobart unit, and together with my mystery box, I have no idea which voltage, current, feed rate, and wire diameter work best under which conditions. One spec I did find was the range of wire feed speed on the spool gun when connected in an approved manner (i.e., not what I did). Their top speed is 660 inches per minute. Mine: 680. Not bad for $21 ($13 for the transformer and $8 for the project box) and two days (and a week of down time waiting for the transformer).
|

|
|
I'm getting close. One thing I've noticed is that my range of feed speed is too large for practical use. The sweet spot on the knob is only a few degrees. Above that range causes arc transfer instead of spray transfer, which slices the aluminum like butter. It also eats tips like crazy because the arc occurs in the nozzle instead of 3/4" from the metal surface.
|

|
|
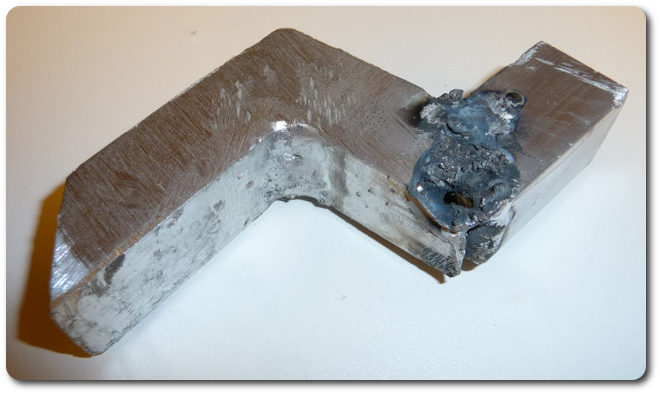
Another try. This involved grinding for a semi-final finish, but the underlying welds, like the fillet, were nice. The burn-through was caused by, ah, forgetting to turn on the argon.
|

|
|
|
These parting shots have absolutely nothing to do with the project, other than being related to welding. But I got a real welding itch after playing with my MIG unit and its new controller, so I started playing around with the old-school oxy-acetylene rig, too. MIG is great at one thing: welding. Gas does everything: welding, brazing, cutting, bending, preheating, annealing, heat treating, freeing stuck bolts, and so on. It also handles metals too thin for MIG. It's more expensive to operate, much slower, and harder to do well, but I can't imagine not having both, plus a TIG unit and plasma cutter.
|

|
|
|
© 2026 Dan Tappan and Eastern Washington University
— last updated 27 May 2026 11:43