Tool Bench
|
|
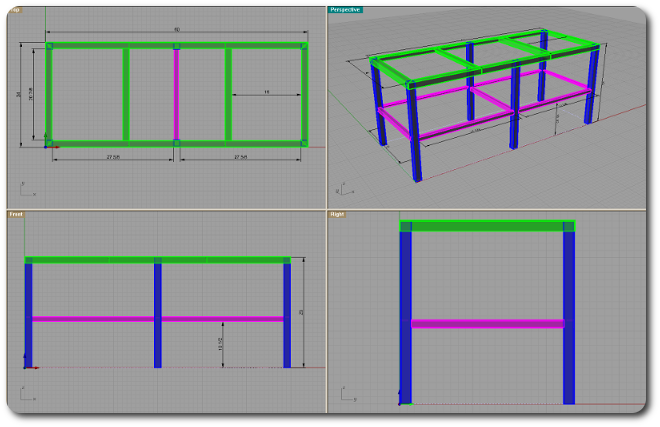
| Granted, this project isn't remotely considered academic research per se, but I think it provides some interesting insight into what engineering professors do on their off time (assuming we had any) using their on-time knowledge and skills. The motivation: my existing 130+ square feet of workbench area wasn't adequate (never is; same with the 230+ square feet of shelf space). So here's the short story describing the birth of an additional 84"x25"x35" tool bench, as well as its welding station. |
|
|
|
The CAD model was totally unnecessary and overkill for building the actual thing, but it does serve a useful role in several of my courses as an example crossover between computer science and other engineering fields. In particular, it has a straightforward 3D geometry, which makes it simple to model, but it has enough different parts and interconnections to provide ample opportunities for algorithmic manipulation and analysis. It was almost within the scope of the CAD/CAM project my software engineering students at ISU had to do one semester. I also needed to build a library of dimensional steel for other projects, so it was no effort to throw this together. I deviated somewhat with more stringers, but otherwise, the final version was pretty close.
|
|
|
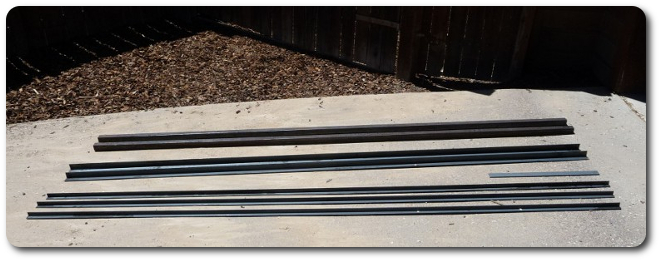
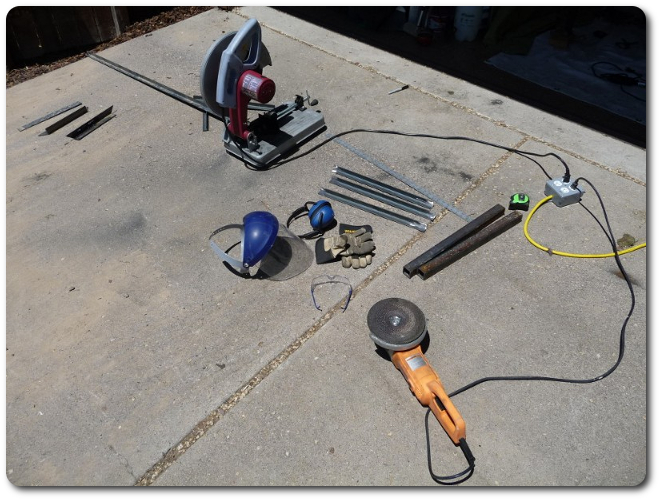
Nice steel, fresh from the supplier: 20' 1 1/2" x 1/8" angle iron, 30' 1" x 1/8" angle iron, 20' 1 1/2" x 1/8" square tubing, and 2' 3/16" x 1 1/2" strip. This ran about $65 directly from the steel yard. Don't ever buy steel from Lowes or Home Depot because it's about 10 times more expensive.
|
|
|
Is steel cheaper than wood? No, but the difference isn't substantial when you factor is how much less of it and various connectors, etc., are necessary. And it was spring in Idaho (mid-June that year), and I could finally work outside (when it wasn't raining), so I chose steel instead of the log-cabin mortise-and-tenon construction on the main bench.
|
|
|
|
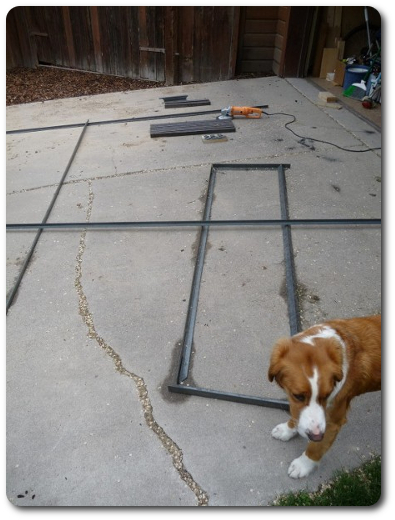
Dog inspection. The horrendous misalignment on the dry fit is due to, ah, quite a toe stub by clumsy me.
|
|
|
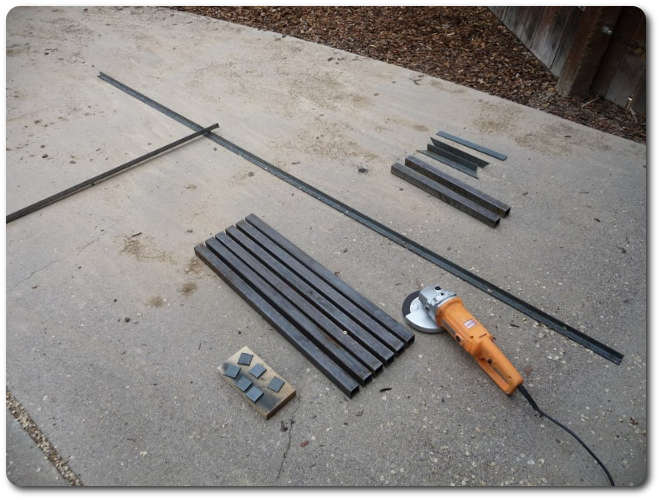
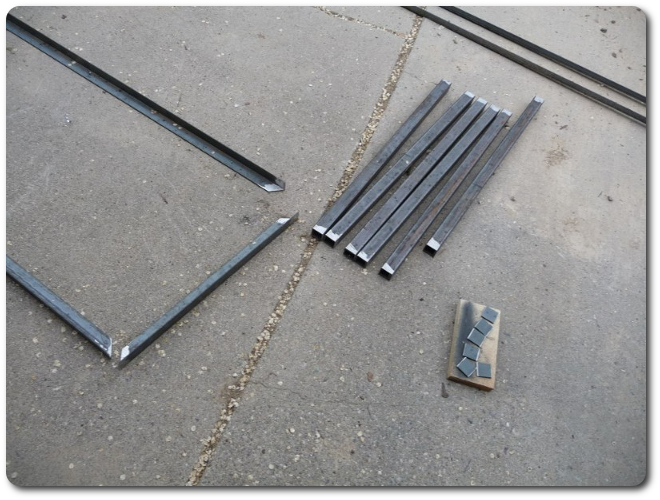
Some of the main parts cut out. Despite what the CAD drawing might imply, the dimensions of the later pieces are determined empirically based on how everything actually fits together. But at least dimensional steel is actually true to the stated dimensions, unlike dimensional lumber.
|
|
|
|
Cleaning up the weldable surfaces. Incidentally, a few years ago I ground down the entire 440+ square feet of concrete shop floor space with this 7" grinder above and a diamond wheel. Harbor Freight might be cheap, but a lot of their stuff is actually worthwhile. I think this guy cost about $29 on sale.
|
|
|
C-clamps on an end post for two degrees of alignment freedom -- remarkably easy.
|

|
|
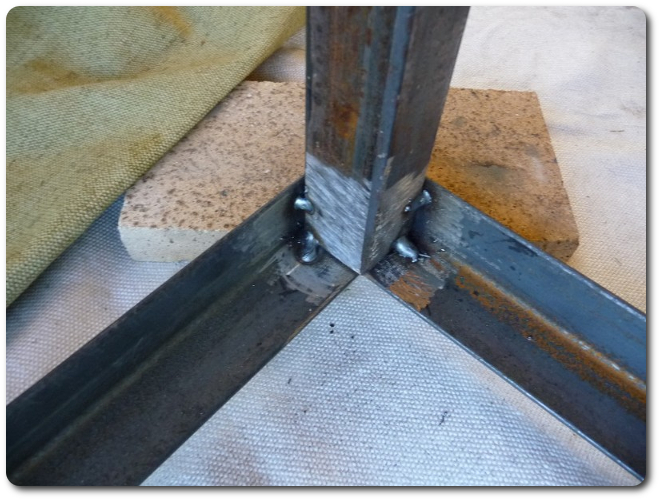
The tack welds. With the two intertwined C-clamps, I can't actually see where I'm putting the electrode wire, so these are pretty crude. But they're on the underside anyway. And they'll probably get cleaned up when I do the final fillet welds.
|
|
|
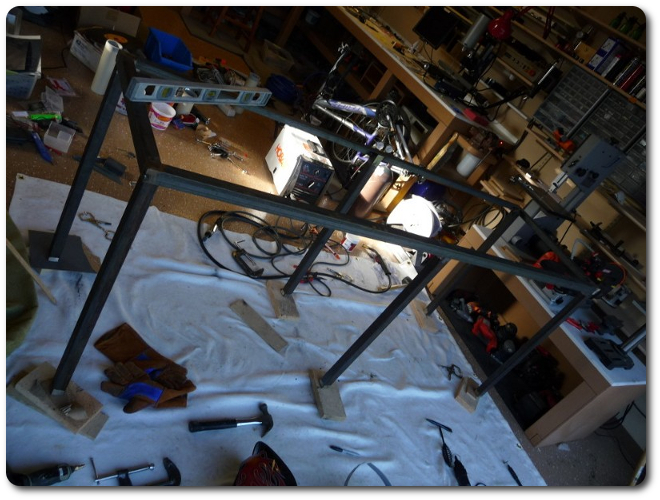
Working upside-down. The floor isn't remotely level (no, I didn't grind it that well!), so the firebricks are all propped up to give decent level references.
|

|
|
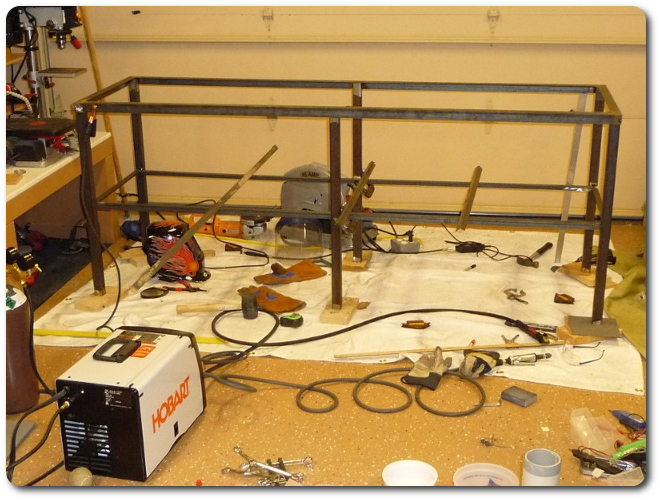
Finally working rightside-up.
|
|
|
Done for the night. I decided to add more stringers, which meant I was short on steel (and the next day was Sunday, so the steel yard was closed). Also, I thought the neighbors deserved a rest from the chop saw, which rivals a jet taking off.
|
|
|
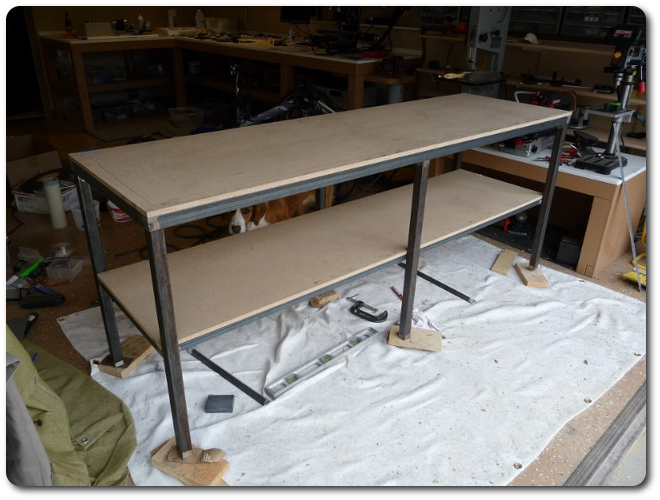
Test-fitting the top surface and shelf from 5/8" particle board I had lying around from the divider-cabinet project. Note the inspector looking at me.
|
|
|
Extra support for the vise and anvil.
|

|
|
|
© 2026 Dan Tappan and Eastern Washington University
— last updated 27 May 2026 11:43