Divider Cabinet
|
|
|
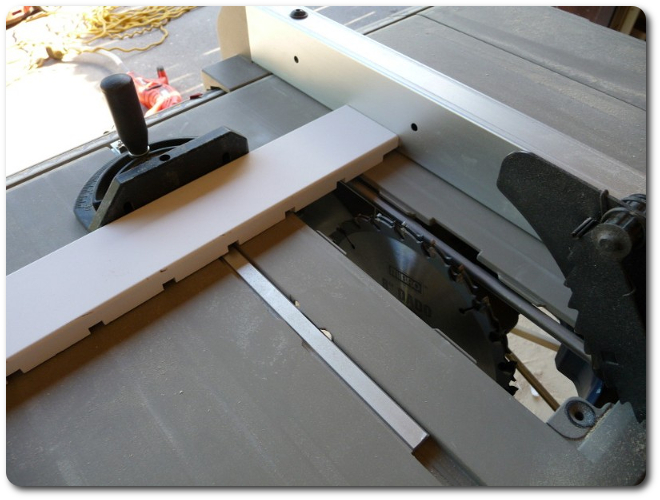
Endless dado cuts. I know a nifty way to reduce the cuts from 234 to 26, but the setup would have taken longer than doing each separately. It's safe to run against the fence like this because these are partial cuts. Through-cuts would launch the short end across the room like a bullet.
|
|
|
Finally done. I contemplated using the mill for these, but they don't quite fit, and the setup time would have negated any advantage (except the tedium of doing this 234 times: 9 slots x 2 ends x 13 drawers).
|
|
|
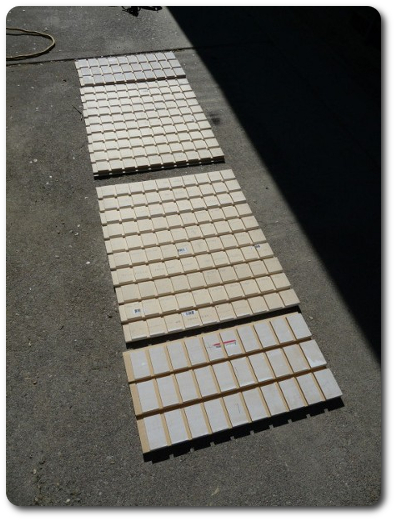
Despite a pile of fancy pieces, there's still a lot more to do.
|
|
|
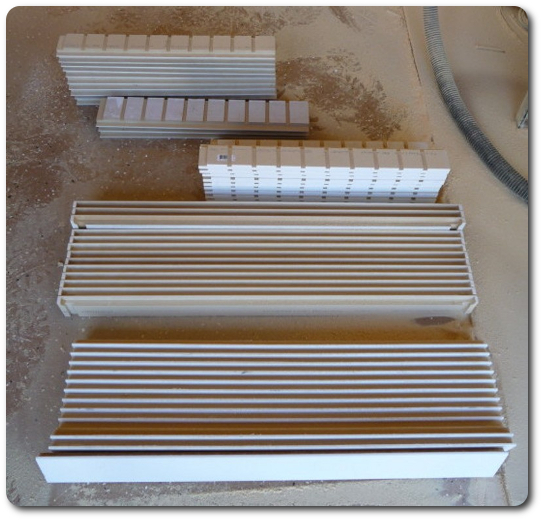
In particular, all the front and back pieces (26 total) need 23 vertical slots for the partitions. There's no way I'm doing this by hand, since there will be 5,382 more cuts (9 dividers x 23 slots x 2 ends x 13 drawers), all of which need to line up properly. So automation is the way to go here, but alas, it's not that simple because my mill isn't big enough to handle these pieces in one pass. So we're looking at a lot of manual setup, too.
|
|
|
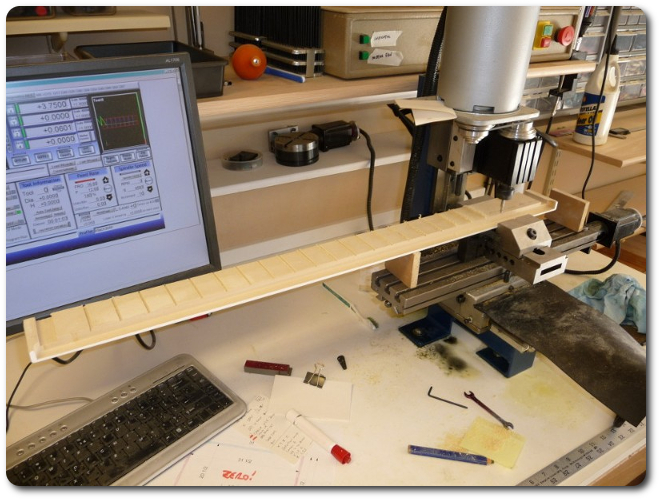
Step 1 is to move roughly to the leftmost position (indicated by the brass nut below the bed).
|
|
|
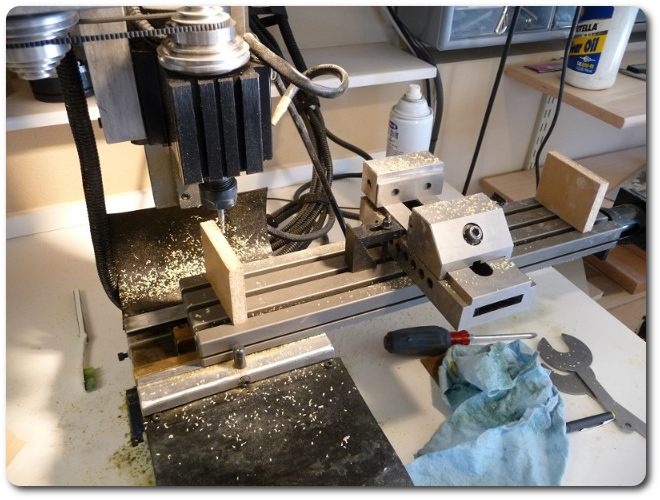
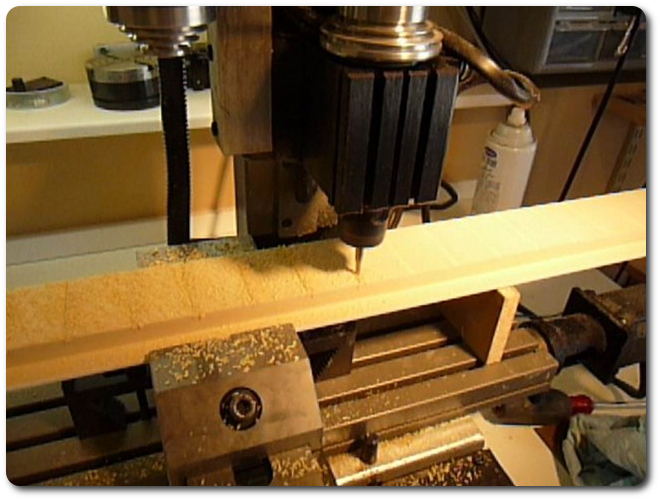
Step 2 is to align the workpiece against the bit to define zero on the X axis. The vise gets tightened, too.
|
|
|
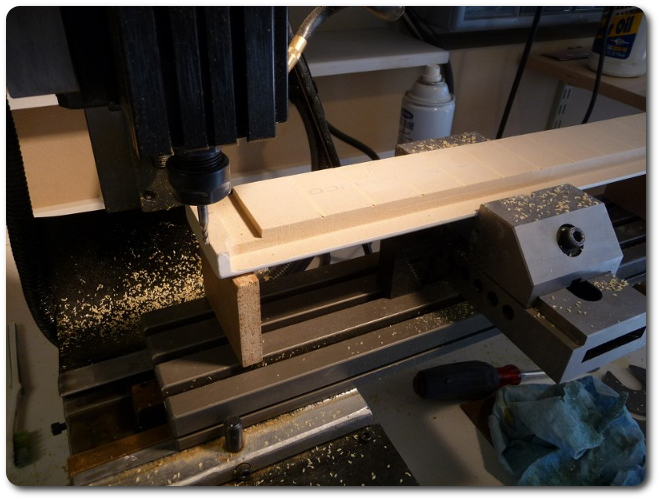
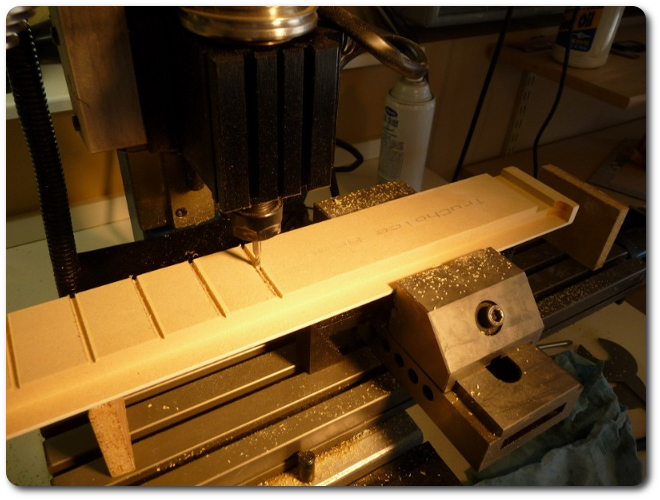
Step 3 is to move to either 1.875" or 2.575" on the X axis to define the first slot, then zero the X. Which value depends on whether the workpiece is the back or front end of the drawer (this is the front here). A previous test on this piece didn't go so well, which explains the wood filler.
|
|
|
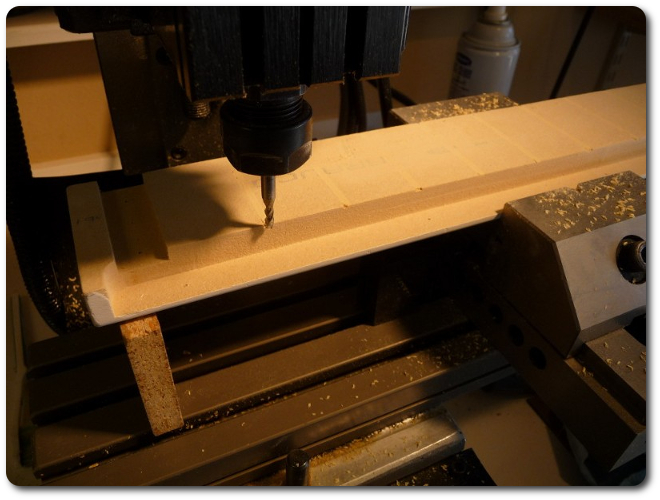
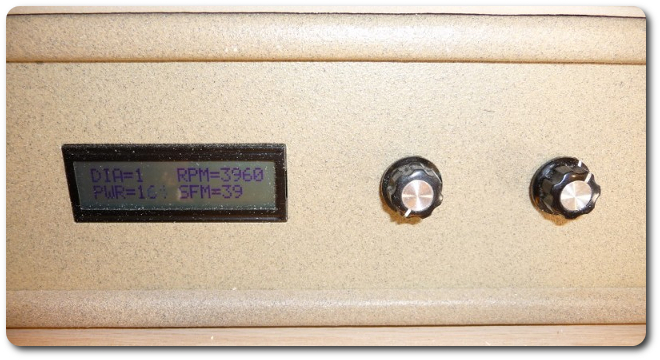
Step 4 is to engage the cutter. MDF is really soft, so cutting speed and feed rate aren't too precise.
|
|
|
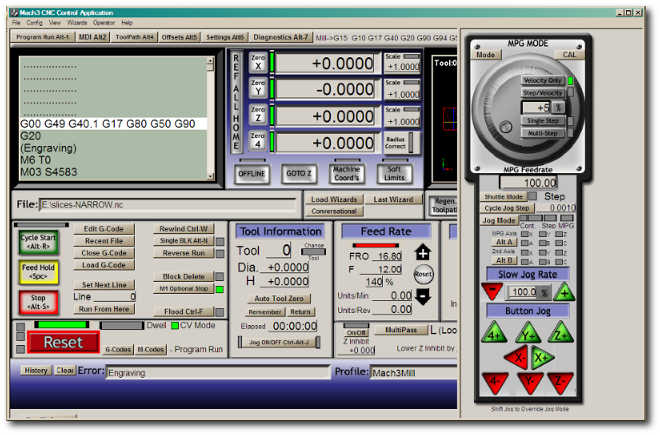
Step 5 is to load the totally uninteresting G-code program for nine slots at a time.
|
|
|
Step 6 is to run it on Mach 3.
|
(video 3 MB)
|
|
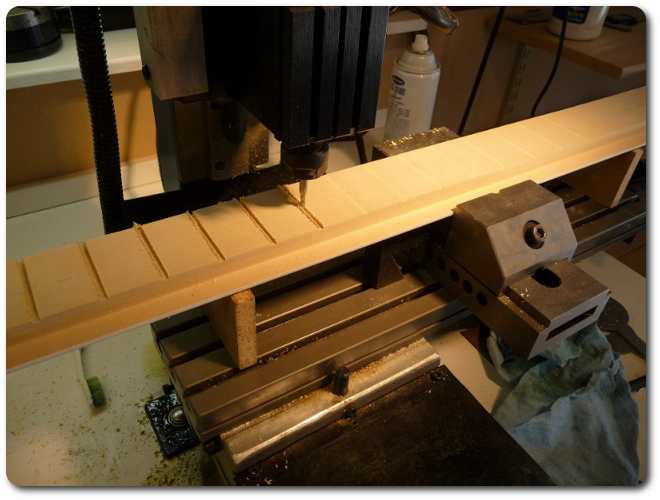
When it's done (pretty quick), the bit sits out here. Step 7 is to move the bit back home in Step 3.
|
|
|
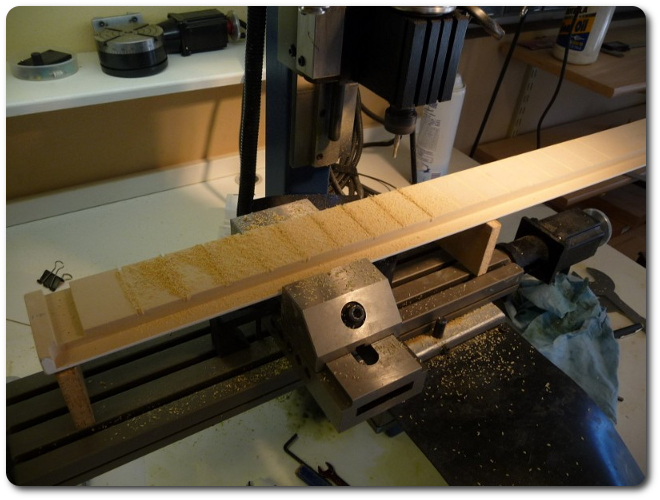
Step 8 is to reposition the workpiece with respect to the last slot cut, then advance X by 1.25" to where the next slot will be cut, then zero the X and go back to Step 4 one time.
|
|
|
After this is done, it's basically the same process from Step 4 again, but the last pass has fewer slots. It's still running the same program though, so it has to be stopped manually after five slots; otherwise, it'll chew into all the nice routing on the end and make me mad (hasn't happened yet). This is actually a depth-first process (spoken like a true computer scientist) by doing one full piece at a time, but I've found that doing it breadth-first, with the same portion across multiple pieces, is significantly faster and easier. This will come in handy with the dividers shortly.
|
|
|
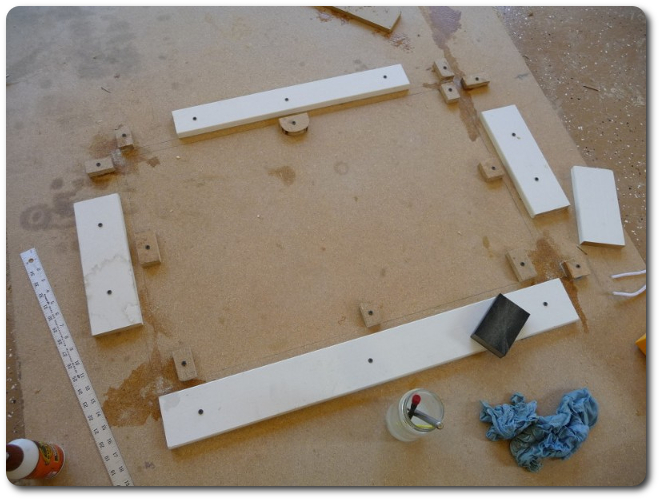
The assembly jig.
|
|
|
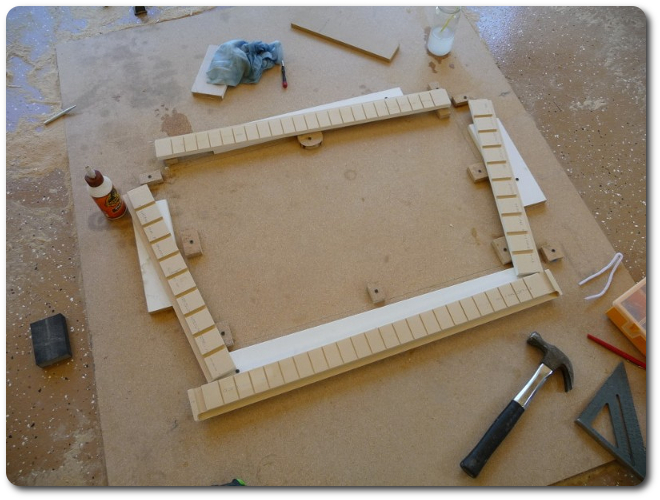
And the latest batch of parts for one drawer.
|
|
|
|
© 2026 Dan Tappan and Eastern Washington University
— last updated 27 May 2026 11:43